Please follow our challenge blog:

Copyright details:

myfreecopyright.com registered & protected The cards shared by the DT on this blog are for inspiration and enjoyment. Please do not copy them for any publication, contest submissions or use them in inspirational or compilations CD's which are then sold on to other crafters. Many thanks for your understanding.

Wednesday 26 August 2020

Shabby Chic Holiday Tutorial

 Hello and welcome to our next tutorial time.
This time we are going to make a simple Shabby Chic card. We have seen so many heavily embossed Shabby chic cards that look downright complicated, so we hope this tutorial will make it an enjoyable.
You will need:
Inks, Card blank, A4 card-stock,  patterned paper/card (double-sided), foam-pad/brush/daubers, sticky foam-pads, glue/tape, ribbon/lace/twine, buttons/charms, gems/pearls
Cut a piece of the  doubled-sided patterned card/paper so it is approximately 4mm smaller than the card blank. This should leave a 2mm gap all the way round. Also cut a piece of plain card-stock/paper so that it is 10mm smaller than the patterned card-stock/paper.
Now using a pair of scissors rough-up the edges of the patterned card/paper. You do this by dragging the blade against the edge. You could also use sandpaper to get an aged effect.

Get your ink and blending foam/brush/dauber and using circular motions, ink the edges of the patterned card/paper, the edge of the card blank and the edge of the plain card/paper.


Once the edges are inked, take the patterned card and curl two corners. You can do this either with your fingers, a pen/pencil or a tooth pick.

Now using a stamp of your choice stamp your image slightly off-set so you have room to add ribbon or lace.

Place a strip of doubled-sided sticky tape or glue onto the stamped topper and stick on the ribbon or lace. If you have some twine then stick this over the ribbon/lace. Your topper is now ready.
Add foam pads to the back of the stamped topper.

Time to assemble all the parts. Using glue/tape stick the roughed patterned paper/card to the card blank.
Now stick your topper to the centre of the patterned paper/card.
Using whatever embellishments you have,  gems/pearls, buttons, flowers, start spreading these around the card until you are happy with your design, then stick them in place.

Hey PRESTO!! you have a simple Shabby Chic card

Now lets see what our lovely design team have to inspire you

                                                                            Chris


We look forward to seeing what you have created
Most important ingredient is have fun 

Buffy and the Fab'n'Funky Girls xx 

Wednesday 12 August 2020

Holiday Time Tutorial

 Hello and welcome to our second annual Holiday Time Tutorial session.
Here at Fab'n'Funky Challenges we are taking our summer holiday but that doesn't mean we aren't here for you.
That's why we have tutorial time

This post will be here for two weeks.

Last year we went through the "masking" technique. This time we are going CAS. for those of you new to card-making CAS stands for Clean And Simple.  
Some purist might say it also has to be one layer, it definitely doesn’t. It just has to have a lot of unused space.
So lets begin:
You will need:-
Stamping blocks, stamps/sentiment, Ink-pads, Markers, card-blank, A4 white card, scissors, double-sided tape/foam-pads/glue, blending pads, stencil, and a HUGE sense of fun
Don’t worry if you don’t have a shop-bought stencil
 Here I show you a range of stencil, the top left I bought, the top right was free on a magazine, but my absolute favourite is the bottom stencil which I made myself. You can probably tell that it is well used and loved.
The first thing we will do is use our stencil
Use your low tack tape to hold it in place and prevent ink getting onto the card where it isn't wanted.

Ink up your sponge/dauber/foam and gently rub over your stencil.

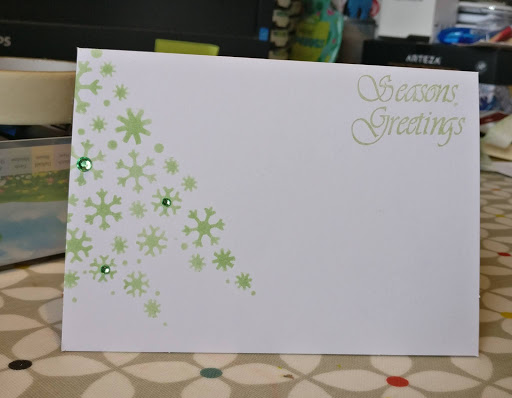
You should have something that looks a bit like this. Now before you remove your stencil we will add our sentiment in the same colour ink.
You could just use a black ink for the sentiment, but I like to colour coordinate.
Believe it or not you could just stop there. Or add a few gems
So that could be card one
But I said we would do the topper card, so let's go...

So now that we have our card base, we are going to stamp our topper (the decoration that will sit on top of the card)

Now colour in your stamped image. I am using ProMarkers, but you can use whatever you have. Pencil crayons are great for beginners or young children.
Then cut them out (daughter doing a little hand modelling here)
If you have sticky foam-pads the stick them to the back of the cut-outs, if you do not have foam-pads then double-sided tape or glue will do.
Find your ideal spot on your card and stick down your toppers.
Hey presto a lovely CAS card, with or without toppers.
Here’s a little secret, the card itself does not have to be white, just lots of plain open space.
 
Here are a couple of examples from our lovely design team

                                                                           Chris 


We look forward to seeing what you have created
Most important ingredient is have fun 
Buffy and the Fab'n'Funky Girls xx 

Tuesday 4 August 2020

Top 3 - Challenge #492 - Christmas

Good Evening Peeps,

Pat here bringing you the Top 3 for our Christmas challenge.  Thank you all so much for all your lovely entries I would have liked to pick you all.  In no particular order here are my choices:

#9 - Cards by Beckie


#12 - Vicki

Vicki-DDSElves-squarefold

#38 - Meg


Please take your Top 3 badge from ou side bar to proudly display on your blog.


Pat and the Fab & Funky girls